
Adventure with bathroom furniture
Something new and handmade in the bathroom
The beginning of the “Bathroom Project”
With great pleasure I worked on the project “The Bathroom”, as probably with many people this is one of those projects where everything comes at you at once. First the light bulb breaks then you see that the sealant is no longer good, the door runs a little stiff, the paint peels off the doors and so on.
Many projects begin two ways, necessity or inspiration. Both were in play when I started this project. I can often be found on Pinterest and YouTube looking for ideas; I saw that more and more people were making concrete sink and countertops. “Regular” concrete by itself is so dark and gray, something I didn’t want in advance.
I did work with concrete to pour a floor and such, but never in projects like this, you have to start thinking about how to make a top like this.
I experimented with different molds and vibrating techniques. After all, you don’t want to see those nasty air bubbles in the concrete at the end.
Finally I found the right tactic by holding a sander against the mold. Moving it back and forth creates vibrations, all those bubbles coming through the concrete.
To keep the drying process from taking hours I used a mix of white cement and quartz sand. This gives you a light colored concrete.
After much experimenting with colored concrete, yellow, maybe blue? or is a better mixture? Finally came the idea to incorporate glass. First without color then with. The result is stunning, literally!
Experimenting with Concrete
In making this vanity I wanted to experiment with concrete, not only how concrete itself works but also what I can do with concrete. I wanted something other than gray concrete, first of all I started to see what was possible, the answer way too much!
On YouTube there are lots of videos of people making their own kitchen countertops out of concrete. In these you can see how they are made, make a mold, pour concrete and wait and ready. This is totally true in the basics, but then come the details.
Still to do it my own way I started experimenting. First with coloring concrete, I had bought a large jar of yellow dye. A big jar was handy because it didn’t really have instructions on it, how much should I use? The first was way too little and the second way too much.
Experimentation doesn’t spoil the fun; it just makes it fun!
After a few tries, you start to get the hang of it. And then you can really get started or rather continue trying more….
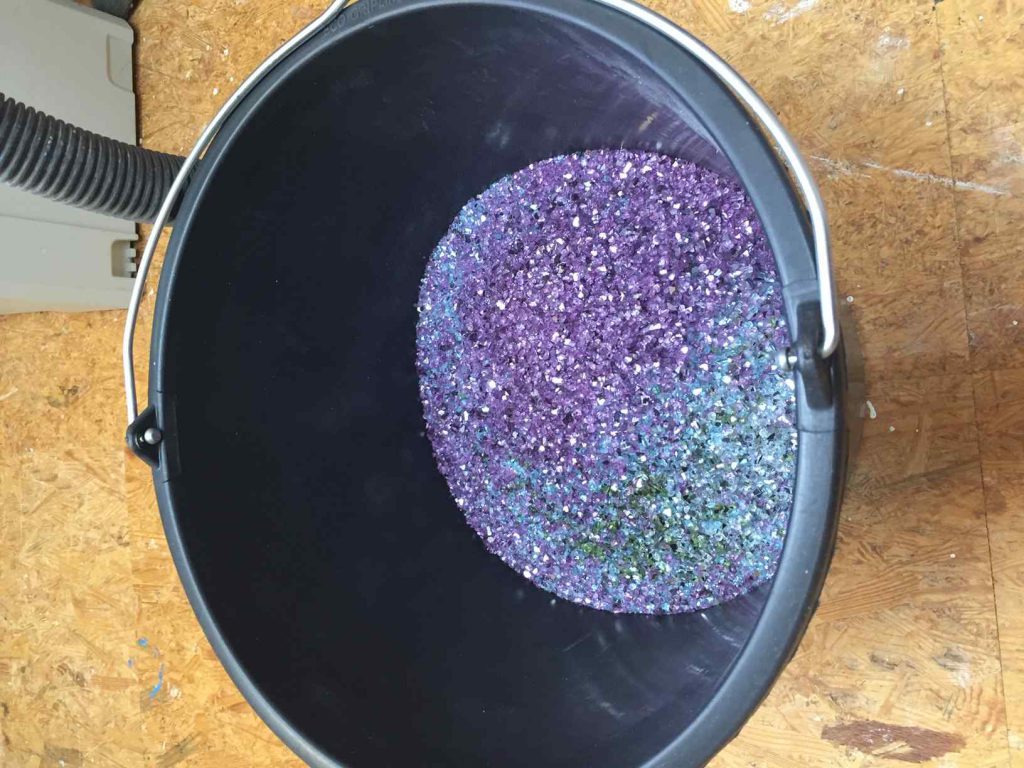
Later I also started to see if I could use glass instead of gravel. “If gravel is possible, surely glass is also possible?”, such a thought that makes you think, yes that’s something for me.
By doing these experiments I began to understand concrete better and better, not to say that I could make everything out of concrete, but I could put down what I wanted to make. I understood better how to vibrate, when to stop, what position. You vibrate to make sure that all the air bubbles in the concrete go to the top (bottom) side. This way the concrete becomes nicer because no bubbles in the surface and more solid. There is no more air trapped in the slab. Fantastic to try.
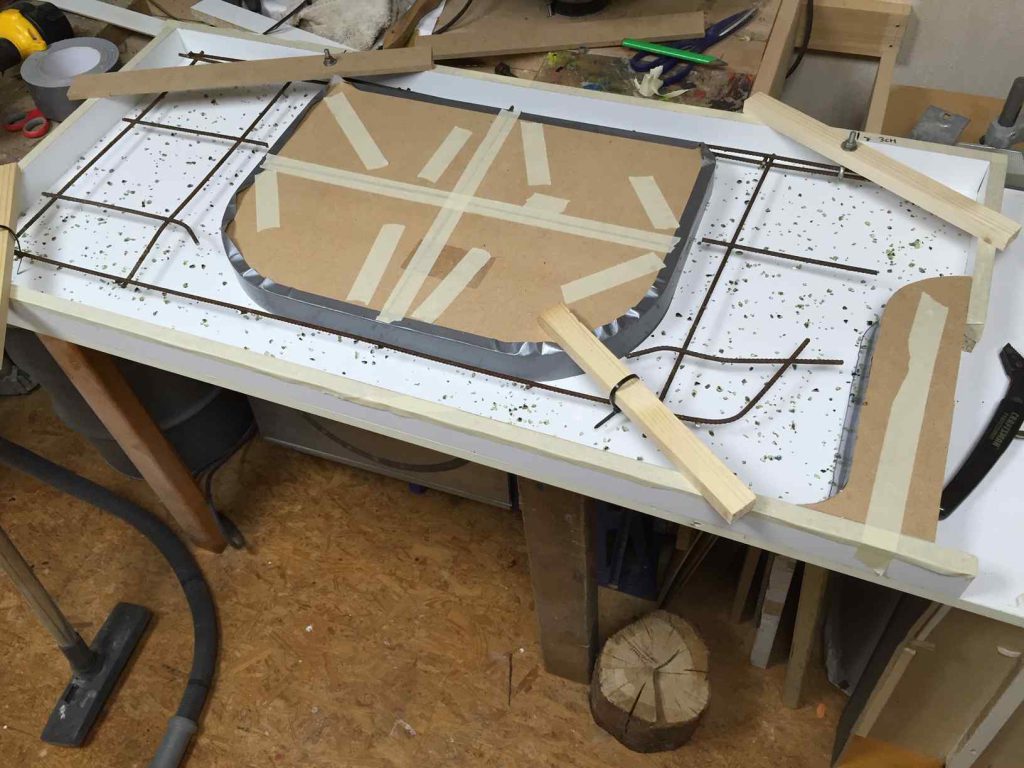
I made the molds from Formica particle board, the same material Ikea cabinets are made from. (Glossy finish.) Curves I made with foam and duct tape so the concrete didn’t stick to them. First in small molds, then you can not only practice vibrating, but also make different editions. Definitely recommended.
The mold
Duct tape, zip-ties and an old closet.
“Duct tape what would we do without…”
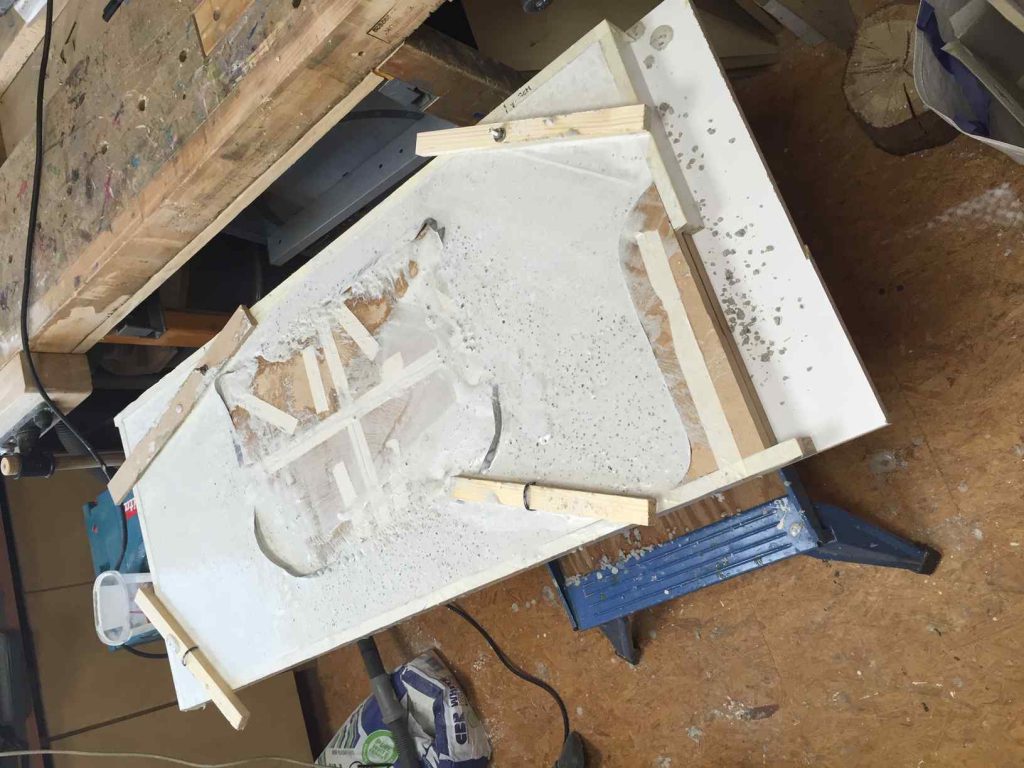
In the mold I sprinkled a small layer of glass, this is to be sure that on the sheet glass can be seen. to make the concrete extra sturdy I used concrete reinforcement. The mold I measured first, and measured again, don’t forget to measure. It had to fit exactly.
Put the mold together with duct tape and an old cabinet, so the concrete won’t stick to that. Duct tape is used to make sure at the end to take the mold apart again. Tape is a lot easier to loosen than a screw or nail that has a layer of concrete all over itself. And then the pouring begins….
Filling the mold with concreet
It turned out to be less difficult than first thought, it was still quite liquid, it slid easily into the mold. Highly recommend giving this a try. The result is fast and you can practice with a much smaller project. I also made some tiles myself first, also to test the color.
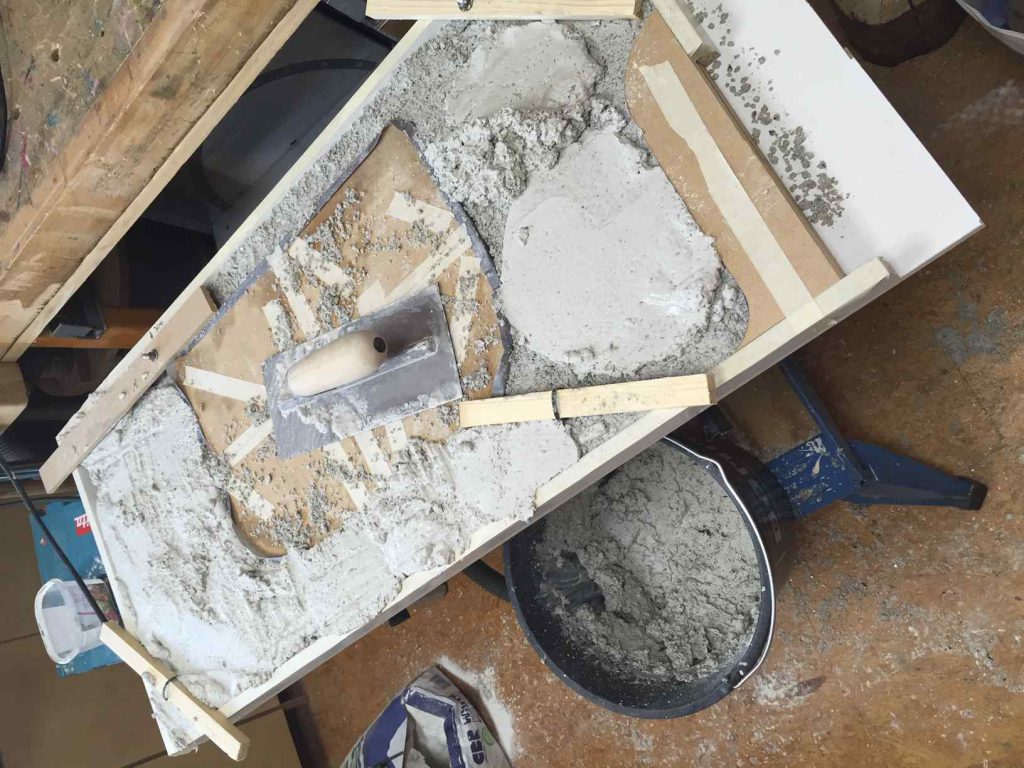
Making sure the concreet is flat
To get the best result also at the bottom I smooth the concrete, this also makes the assembly at the end a lot easier. The cabinet then doesn’t have to be adjusted at the bottom. Or it saves time in touching up the concrete slab. If none of these are problems, because you are using a different design. Just make sure the front is smooth that prevents open fingers and other woes.
Building the cabinet
Building the cabinet always starts with figuring out what style I want something in. This is done by using Pinterest, watching YouTube videos and of course about where you come to look at everything.
Figuring out the type of wood was crucial in this case. It has to be a wood type that can handle moisture well not work too much (Moving the wood). After all, it is a bathroom. It ended up using baltic birch plywood. that is pretty good for bathroom use, if it’s sealed.
The cabinet needed enough space for towels and washcloths. The cabinet had to be mainly practical which succeeded! Everything fits in it happily.
I chose drawers with rails, so you can easily use the cabinet even if you just got out of the shower.
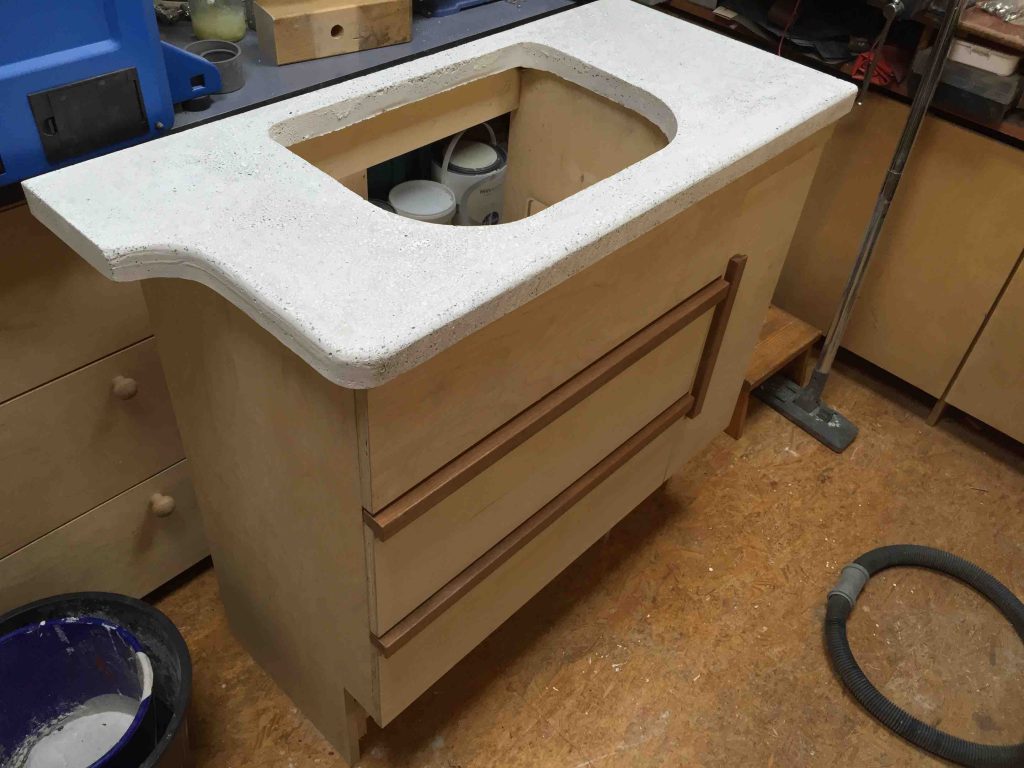
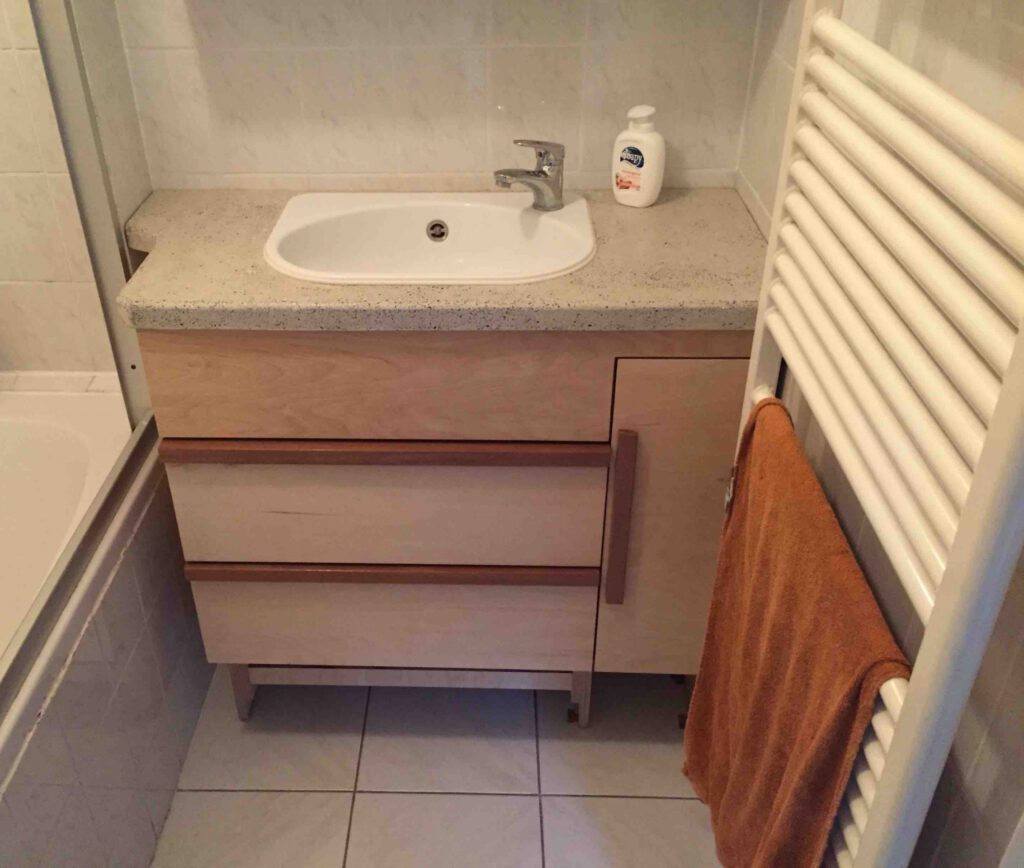
Result!
I am incredibly happy with the end result and use it every day after showering. Sometimes it’s the small projects that challenge you and the bigger projects less so, sometimes it allows you to experiment on a grand scale!
For anyone needing a new bathroom cabinet, give it a try yourself!
Want to know more?
Would you also like a Cutting Board, tray or other functional wood artwork? Get in touch with me!